Ultimate Welded Differential Guide
Are you tired of your buddies mocking your one tire fire? It’s time to explore upgrading your differential. We’re looking at the budget solution in this guide – welded diffs.
- How A Welded Diff Works
- How To Weld A Diff
- Welded Diff On A Daily Driver
- Welded Diff vs. Open Diff vs. LSD
- Common Welded Diff Questions
- Conclusion
Introduction
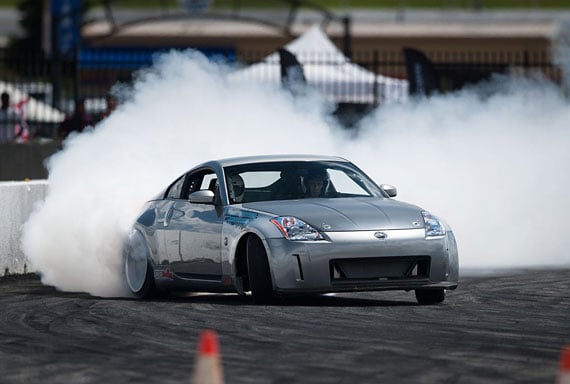
Whether you know it as the one tire fire or the one wheel peel, we’ve all been there when that one dude at the local meet tries to show off, but it all goes cringeworthily wrong.
If that dude happens to be you, we apologize.
However, we’re here to help you redeem yourself for your next attempt, which will hope will be slightly less embarrassing when you finally manage to smoke them out with your newly-improved welded diff burnout.
If you’ve ever witnessed a full-blown budget drift missile, we’d be willing to bet pretty decent money that they opted for welding their differential.
However, they aren’t exclusively useful for missile builds.
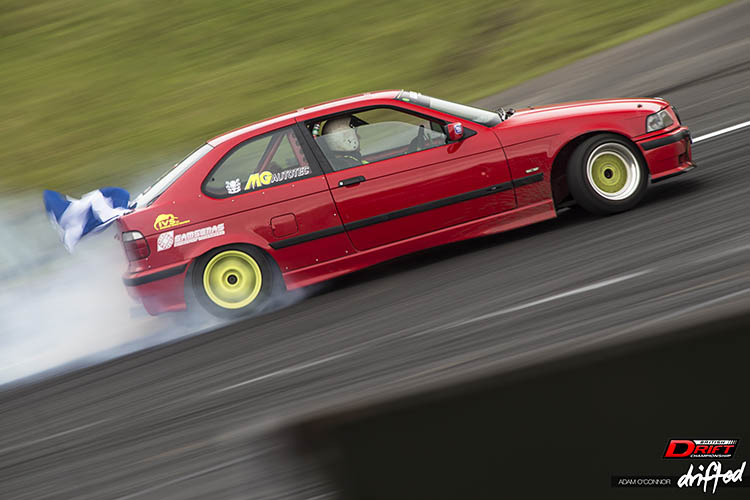
Welded diffs can offer the perfect budget-friendly alternative for those of you that are getting into drifting, but haven’t got huge chunks of cash to throw at every upgrade.
And believe us – there will be plenty of upgrades!
Typically, your soon-to-be drift car will begin life with an open differential, unless you’ve opted for a performance car, where you may be lucky enough to have a limited-slip differential already.
Although it’s often a controversial mod, welding the stock diff is extremely popular in the drift scene, since it provides the most cost-effective way to encourage intentional oversteer while enabling the rear wheels to remain spinning under load.
There’s no question that a welded diff will offer many advantages when stacked up against an open diff when it comes to drifting, but you’re probably aware that the welded diff experience does come with a few downsides.
When it comes to shredding tires at the track, you’ll be delighted that you decided to weld your diff.
But, when it comes to daily driving, it’s a whole different story and something that’s undoubtedly going to take some adapting to.
With the correct knowledge, a welded diff can provide an easily-liveable daily-driven experience, but you may want to brace yourself for the clunks, chirps, wheel hops, and whines that are likely to keep you guessing.
We’ll discuss the quirks of daily driving with a welded diff later in this guide, but for now, let’s look at exactly how they work and why so many drifting enthusiasts are opting for this mod.
How A Welded Diff Works
Typically, most cars come with an open differential, ensuring that the outside wheel turns faster than the inner wheel, enabling the most efficient and practical way of turning a corner.
It probably won’t come as much of a surprise that a welded diff won’t be quite as efficient or practical for everyday use.
However, it will essentially lock the axels together, enabling both wheels to spin simultaneously, and upon cornering, the inner wheel will lose traction and skip.
When combined with speed and hopefully a little bit of practice, this enables you to intentionally force the car to oversteer, which will be the first step on your goal to mastering the art of drifting.
When it comes to drifting or oversteer, the diff must remain locked for optimal control, and as you may have guessed, welding a slab of metal into your differential is going to be the cheapest way to help you achieve that.
With your locked diff, your throttle input during the corner will keep both of your cars back wheels spinning at the same speed, hopefully encouraging your vehicle to maintain a (perhaps not so) controlled slide or drift.
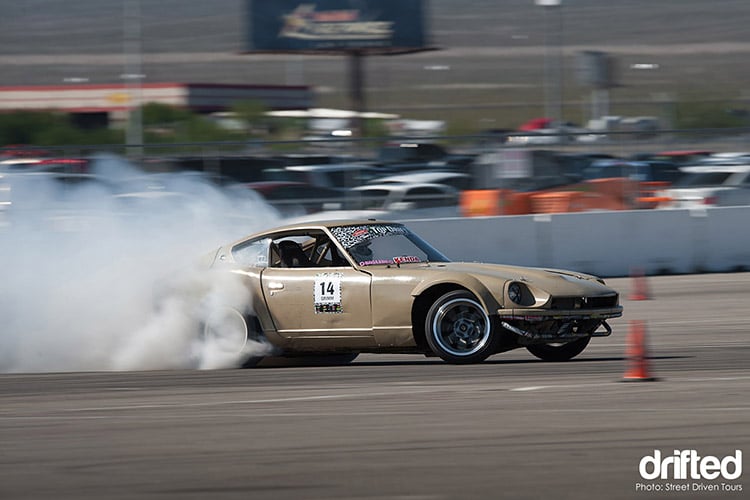
Although this provides the perfect budget skids at the track, it’s not quite so practical for those of you that then plan to drive your drift car daily.
An open diff would typically allow the outer wheel to rotate faster, making cornering far more predictable in daily situations.
Despite an open diff being practical for daily driving, it’s a hugely unpredictable mess when it comes to drifting, with the wheels randomly rotating as they attempt to correct themselves.
With a welded diff, it’ll behave far differently to any other car on the road, since the outer wheel would need to cover a larger radius, and you’ll likely experience skipping, jumping, and perhaps even sliding when trying to navigate tight-turning situations.
We’ll take a more in-depth look at daily driving scenarios with a welded diff later in this guide.
To summarize, welded diffs make a significant upgrade to your budget drift car, removing the typical, sensible function of an open differential to ensure maximum sideways action by welding together the differential gears.
Although this is fantastic for car control while drifting, it can make low-speed navigation a little more challenging when it comes to things like parking, as one rear wheel becomes reluctantly forced to go against its wishes.
For those of you that are frequently looking to oversteer (drift) your car, a welded diff is going to provide the perfect solution at a minimal cost.
How To Weld A Diff
Before you weld your diff, we recommend checking over your drivetrain to ensure that everything is healthy. It may also present an excellent opportunity to upgrade your rear bushings at the same time.
It also helps if you know someone who has experience with welding, although this is one of the easier jobs, so as long as you’ve got a decent guide at hand, things should (hopefully) go smoothly.
If it’s your first experience welding, then always make sure you do some test/trial runs to begin, as having a welded diff become unstuck is likely to render your diff unusable.
So, let’s get started with welding your differential.
Step 1: Get yourself a welder
You may have guessed, but at this point, the first step if doing this yourself is to purchase or borrow a welder!
Step 2: Remove the differential from your car
Alternatively, you can also opt for purchasing a spare diff to weld, as a ‘just in case’ precaution. These can often be bought for cheap, depending on the vehicle, and spares are (of course) always useful to have.
Although this step sounds simple, if you’ve got a rusted rear end, removing the diff can often prove to be the most challenging part of the entire process!
Step 3: Drain the oil, and remove the diff housing
Make sure you’ve got a suitable container for the oil to go in before you remove the diff housing so that you can immediately pour the oil out.
Some opt for using the ‘window’ in the differential rather than removing the casing, but we would always recommend removing, especially for beginners, also allowing for a full inspection of the condition for peace of mind.
Once you’ve got rid of as much oil as possible, it’s advisable to clean up the diff as best you can with non-chlorinated brake cleaner or a similar product, do NOT use a chlorinated brake cleaner, as this can release toxic gases when welding.
Step 4: Get welding!
Now that you’re confident you’ve removed the oil and got the diff as clean as possible, it’s welding time.
At this point, consider getting a competent assistant on hand, or ensure that you’ve already got some initial practice in.
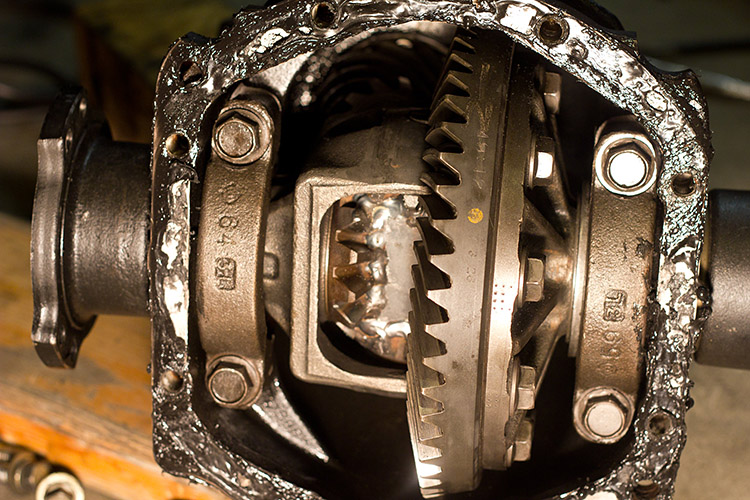
Now that you’re ready to get started, we’ve found that the best way to approach welding your diff is to begin where the spider gears meet.
It’s these gears that are currently allowing your rear wheels to rotate at different speeds, so welding them up will seize them solid, forcing your rear wheels to begin spinning simultaneously.
Turn the welder to full power, with the wire speed a bit lower than full, and ensure that you’re heating the teeth of the gears well.
Weld the gear teeth together in each corner, and don’t be afraid if they start glowing if you’re able to get it that hot.
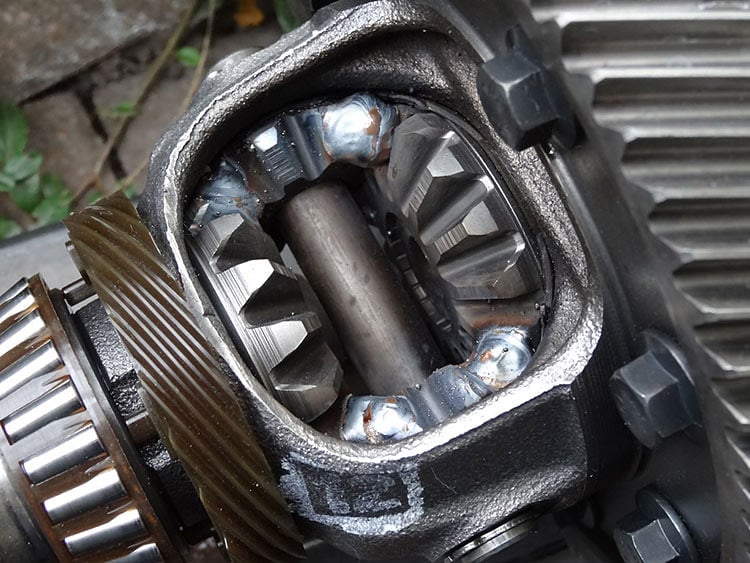
Although some owners are satisfied with just welding where the gears meet, we recommend also going one step further by fitting a steel plate into the center and welding that in place to ensure maximum possible strengthening.
Try and keep the welding relatively even. You don’t want to have twice as much metal on one side of the diff, for example.
At this point, ensure you’re happy that you’ve provided a sufficient quantity of weld into your diff to ensure it’ll never be moving ever again, and your work is complete.
Allow it to cool down before moving on to the next stage.
Yes – it is that simple!
Step 5: Cleaning up and refitting
Now that your welding is complete, it’s time to have a clean up to ensure there’s no debris left inside.
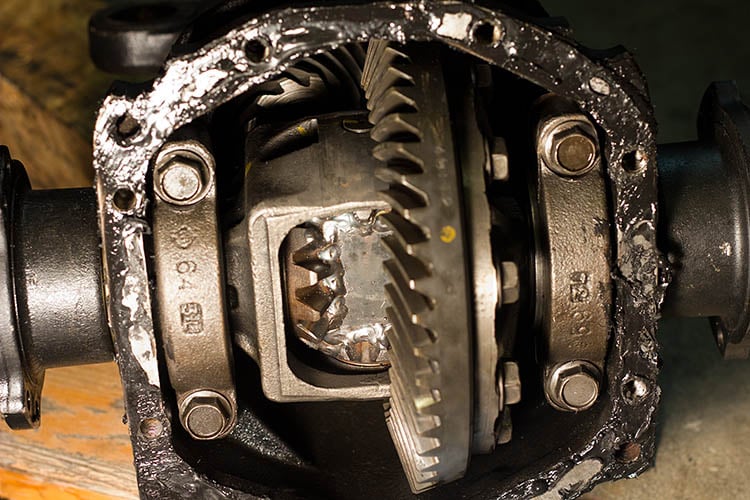
A fresh cover gasket will be ideal at this point if you have one to hand.
It’s time to pour in some delightful fresh oil and refit before celebrating with your buddies that you’re no longer the local one tire fire embarrassment!
Welded Diff On A Daily Driver
Admittedly, we probably should’ve informed you about what you’re likely to encounter when daily driving your welded diff before welding, but where’s the fun in that?
You’ve likely read all the horror stories about how unbearable daily driven cars are when it comes to a welded diff.
Sure, it’s certainly a different experience, but is it as bad as the forum heroes make out? Not really.
When daily driving with a welded diff, there will become additional precautions and techniques that you’ll soon implement to make things more convenient.
While it’s an ideal option for a budget weekend drifter, it’ll soon change how you approach the simplest of tasks when you’re navigating the local streets.
Although you’ll have no idea that you’ve got a welder fitted when you’re cruising on the straight highway, it’s a different story it comes to basic tasks, such as creeping around the local parking lot.
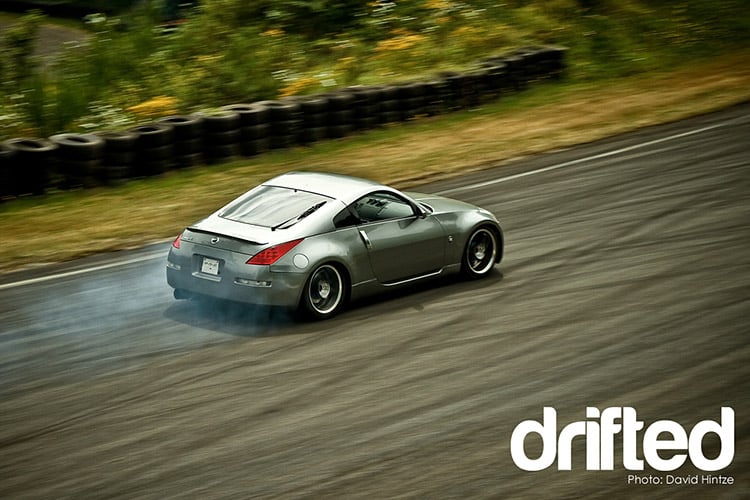
As you attempt to park up in a tight spot at your local grocery store, prepare to become the center of attention of anybody in the local area.
Shortly after, they’ll be preparing to form an orderly queue to inform you that your beaten drift missile appears to have a rather severe problem, as though you weren’t aware of the clunking, screeching, and skipping noises as you’ve bounced up and down for the past few minutes.
Low-speed maneuvers are going to become a far more complex challenge than ever before, and alongside car parks, you’ll also need to be prepared for the back-end to keep you on your toes on a roundabout or a simple corner, especially in the wet or the snow.
It may sound terrifying, but once you’ve adapted your driving to suit the welded diff, slow driving becomes a whole new amusing experience of its own.

And don’t panic, the rear end isn’t going to fly out magically, you will need to either be encouraging it to do so, or you’re likely to be approaching the corner with too much speed.
When it comes to ‘normal’ driving, the best approach to reduce wheel hop is to take the technical ‘racing line’ through corners to minimize the angle of each turn.
Since you won’t get wheel hop when traveling in a straight line, opting for the straightest possible line through a corner is the best solution.
Not only will this avoid the ‘skipping’, but it will also preserve your tire wear, which is likely to increase, although, at this point, you hopefully intend to shred them soon anyway!
Once you learn how to drive with the welded diff, it quickly becomes familiar and allows you to feel precisely how much grip you have with the road, especially when compared to the unpredictableness of an open differential.
So, when it comes to driving with a welded diff on your daily driver, you’re going to need to pay a little more attention than you typically would.
However, when you’re driving in a straight line above 30 mph, you’re hardly ever going to realize a difference, and it’ll feel perfectly normal on the highway.
When it comes to tight corners in the rain, you’re going to need to approach the situation with a little more caution than usual, especially if your tires are a bit worn, but it soon becomes very predictable.
With snowy weather, welded diffs are a challenge, but with some decent snow tires and a sandbag in the trunk, we’ve found them far more manageable than your typical open-diff stock BMW, and also heaps more fun.
Sure, it’s going to turn a few heads in the local car park and cause some intense stares, but other than that, it’s perfectly adaptable on a daily-driven car, and it’ll also help you learn throttle control for when you head to the track, too.
Welded Diff vs. Open Diff vs. LSD
Although we’ve explored open diffs and welded diffs quite a bit already, where does the limited-slip differential come into the mix?
LSD’s provide a middle ground between the two and often come with a premium price tag.
Where your car is likely to have an open diff already, we know that a welded diff doesn’t come with much additional cost, but things can add up quickly when it comes to LSD’s.
Despite this, there’s no question that LSD’s offer the friendliest all-round experience of the three.
Where the open diff is never locked, and the welded diff permanently, the LSD allows both.
An LSD will only lock up once a certain amount of torque difference is provided, dictated by the clutch plates.
So, although it takes a bit more effort to get the back-end out, especially in lower-powered cars, it also means you’re less likely to have it happen when you least expect it.

There are different types of LSD’s, and Viscous LSD’s will work well for drifting in the rain but don’t offer the same performance and predictability of 2-way aftermarket differentials or a welded differential in the dry.
And so we have two choices; Welded or 2-way? Now some may ask, “Hey, what about 1.5-way?”
The 1.5-way is intended more for the road course guy trying to get the fastest time coming out of that turn and being able to accelerate and decelerate without significant traction loss.
A 2-way diff locks up under both acceleration and deceleration, where a welded diff has 100% deceleration.
Some owners prefer a welded diff, for this reason, making them more predictable, while others prefer the 2-way.
A 2-way will also provide far less tire chirping and is much more convenient in parking situations and making turns at sharp speeds, although it’s still not going to be as smooth as an open differential.
They’re also adjustable to suit the individual drivers’ preferences.
Although 2-way LSD’s are typically expensive investments, you’ll sometimes be able to cop a used one for as little as a few hundred bucks, and they’re likely to put less stress on your drivetrain, which could end up being a worthwhile investment.
An LSD will be the more tolerable choice on a daily driver, but we feel that the welded diff still presents a fantastic alternative for those on a budget.
If it means that you get more track time with your welded diff instead of saving for an LSD, we’d say that could well be a wise investment.
If you’re keen to know more about various differentials, make sure you check out this guide.
Common Welded Diff Questions
We’ve noticed a common trend in those considering welded differentials, so we’ll provide some brief answers here.
Can you track a welded diff?
Although they’re fantastic for drifting at the track, a welded diff can provide understeer on turn-in, which isn’t ideal for grip racing.
For those interested in doing both drift days and track days, an LSD is likely to help you achieve superior lap times.
How long does a welded diff last?
The reliability of a welded diff mainly comes down to how well executed the welding was in the first place.
When welded correctly, we would expect long-lasting results with almost zero maintenance.
On the other hand, with terrible welding, it’s anyone’s guess before you’ll inevitably be fishing metal shards out of your diff.
It is worth considering that you are likely to put more strain on the drivetrain components, which usually affects the reliability in other areas such as subframe mounts, bushes, and driveshafts.
Where can I get a diff welded?
It may be useful to ask this on your local car owners’ clubs.
Try to find someone that has a good reputation, and if possible, try and be there when they do the job so that you’re happy with the welding job based on your new-found knowledge.
Prices for this can vary, but if you’ve already removed the diff, or you’re taking a spare, we would expect it to cost around $50.
Can you unweld a diff?
Simply – no.
Once you’ve welded your diff, it’s a done deal, and if you regret your choice further down the line, your best options will be to swap or replace it.
What happens when a welded diff breaks?
The best-case scenario would be that you lose the drive, and you’ll have a junk diff that’s full of metal shards.
The worst-case scenario could be that your car suddenly grips-up mid-drift when you least expect it, and, as you can probably imagine, that’s not likely to end too well; this is why we feel it’s vital to ensure substantially strong welds and complete coverage.
Conclusion
So, the common question here seems to be ‘Is a welded drift bad?’.
A welded diff isn’t a bad thing by any means. In fact, for a budget drift car, it’s going to provide the perfect opportunity to throw your missile down sideways at the track without having to spend big bucks.
Is it the perfect solution for daily driving? No. However, it’s far from impossible.
Sure, there’ll be a lot of unnatural reactions from the car to deal with initially, and you’ll undoubtedly need to prepare yourself for the confused stares in the parking lot, but you’ll soon learn to adapt to the ‘quirks’ of a welded diff.

The simplicity and cost-effectiveness of a drift make it a common choice for drifters.
Those looking to drift competitively may want to consider going down the route of a 2-way differential, but for beginners, a welded diff presents the perfect opportunity to begin your tire-slaying future.
Considering this can be done for free with your welder or a decent friend that has one. Alternatively, the worst-case scenario is likely to be around $50 at the local shop – this has to be one of the most cost-effective drift mods you could ever consider.
So, there we have it! We hope that we’ve covered everything you could want to know about welded diffs in this guide.
Thank you for reading our welded diff guide.
If you enjoyed this article, then please share it with the buttons at the side and bottom of your screen. If you’ve found this information useful, then please take a moment to share it with other drift enthusiasts. We appreciate your support.
Photography credits
We thank the following entities for the use of their photography in this article:


