Fender Rolling – Your Complete Guide!
Table of Contents
Are you tired of scrubbing and destroying your fresh new tires? Fender rolling provides the perfect solution, and it’s simpler than you may think. We explain all you need to know in this guide.

- What Is Fender Rolling?
- How To Do Fender Rolling
- DIY – Fender Rolling With a Baseball Bat/Metal Bar
- DIY – Fender Rolling With a Hammer
- Fender Rolling vs. Fender Pulling
- Fender Rolling vs. Fender Cutting
- Fender Rolling Cost
- Fender Rolling Gone Wrong
- Conclusion
Introduction
Whether you’re into drifting, stance, or you’re merely trying to improve the look of your car, aftermarket wheels are likely to be one of the first upgrades that you make.
However, the chances are that you’re going to go with a far more aggressive fitment this time around, and sometimes you haven’t considered that those perfect fitment pics you’ve seen online have already carried out fender rolling.
So, you fit your stunning new rims wrapped in their fresh rubber, and cruise to meet your buddies with a huge grin on your face.
But, once you pick them up to give them a ride, you’ll soon realize that you’ve overlooked an all-important element – fender rolling.

With every bump in the road, you begin to feel an increasing amount of internal agony, as your mind is screaming, “HELL NO, STOP THE CAR RIGHT NOW”.
But you’ve got somewhere you need to be, and you’re terrified that you’re going to arrive with bent and twisted fenders by the time the journey is over.
As bad as it probably sounded along the way, you’ll survive this short journey, but it’s the perfect wake-up call of realization that your next task is going to be getting your fenders rolled.
If you don’t get it done soon, it’ll soon begin scraping its way into your brand new tires, which could potentially lead to a defect, or something even worse if it goes deep enough to cause a blowout.
Don’t be “that guy.” Get it sorted right away.
Fender rolling is one of the most common jobs for any tuner, and when done correctly, it’s an easy and satisfying job (even if a little nervewracking) that you can easily carry out at home.
What Is Fender Rolling?
Fender rolling provides a quick, convenient, and easy solution to gaining valuable extra clearance to enable your aftermarket wheels and tires to fit with perfection.
Sometimes just a few millimeters of additional fender clearance can differentiate between a horrifically-scrubbing fender and an entirely cleared one.
In an ideal world, you’re planning on copping some wheels, or you’ve not yet purchased them, and you’re here as you’re prepping in advance for what lies ahead.
However, we know that isn’t always the case, and sometimes we need to learn the hard way.
Hopefully, there hasn’t yet been any damage caused to your tires, with some extreme cases, your wheels.
Or, in the absolute worst-case scenario, your rear quarter.
Admittedly, it sounds dramatic, but we’ve seen all of these happen in the past, so make sure that you don’t leave it too late.
Typically, your stock car body didn’t leave the factory with housing larger, wider, wheel and tire combos in mind, and when fitting aftermarket wheels, this is where the problem lies.

The protruding lip in the inside of the fender is likely to be the culprit of your scrubbing issues, and when it hits the tire at speed, it’s going to be a lot sharper than it looks, and this is where it’s causing potential damage.
Over time, this can cause damage to your wheels and tires, but it can also destroy the paint, which is liable to begin rusting away before you know it. As I’m sure you’re away, a rusty rear quarter is far from ideal.
So, to eliminate all of these issues, it’s time to roll your fenders. There are numerous ways to do so, and we’ll cover all of them in this guide.
When executed correctly, fender rolling will look the same as the OEM stock body from the outside, and you’ll only be able to see the changes if you look up into the fender, as it’s just the ‘L’ shaped lip that we’ll be tucking in.
Alternatively, some people prefer to do a pull, or both a roll and a pull, and we’ll explore those options later in the guide.
We’ll cover how to do fender rolling the correct way, and we’ll also explore the riskier, ghetto DIY possibilities for those looking for a quick fix that could potentially cost $0.
Is Fender Rolling Worth it?
If you’re struggling for clearance, fender rolling is often the preferred method for eliminating any scrubbing issues.
Although there are some rare instances where the fenders are plastic from the factory, or sometimes fiberglass, rolling will be a costly mistake, so make sure that the ‘lip’ we intend to roll is metal before you get started.

Once rolled, the flattened lip allows for perfect fitment, whether you’re looking to tuck your drift wheels under or going all-out with a “Hellaflush” stance look.
Some owners choose to cut their fenders, and some choose to pull, which we’ll dive into later in this guide.
But, generally, fender rolling is the most popular choice, and when you stop fouling your tires, wheels, and potentially damaging your car bodywork, you’ll realize it’s well worth the effort.
Is Fender Rolling Bad?
Fender rolling sometimes gets a bad rep, but this is usually down to trying to rush the job, or not doing it correctly – neither of which we recommend.
When you’re bending painted metal, there’s always a small risk of things going wrong, and many professionals will provide a disclaimer on their fender rolling for this reason.
In the worst-case scenario, you might not even be bending metal. If your car has had a cheap repair job in the past, you may have filler/bondo hiding in the fender, and as you can probably imagine, it’s not too flexible.
It’s worth doing what you can to ensure that this isn’t the case, as it’s likely to go very wrong.
If you’re feeling brave, we’ve included a “Fender Rolling Gone Wrong” section at the end of this guide to ensure that you don’t make the same mistakes as they have.
With the correct methods combined with care, patience, and precision, there’s minimal risk of going wrong.
If you don’t feel entirely comfortable with the process, we’d recommend heading to a professional. We’ll take a look at the typical prices we’d expect to pay for a pro job later in the guide.
How To Do Fender Rolling
Thankfully, with a reasonably-priced fender rolling tool, a heat gun, and a lot of patience, we’re feeling confident you’ll be more than capable of rolling your fenders yourself.
We can’t stress enough how important it is to check your fenders’ condition before you start, and do your best to ensure that no filler/bondo is hiding in the area.
If your fender has had a repair job has in the past, then it’s likely to crack and split, which is, of course, not what we want to experience.
First things first, we need to purchase the tools for the job. Here’s everything you’re going to need:
Eastwood fender rolling tool – Although there are other options on the market, the Eastwood has been ours, and many others, the trusty weapon of choice for many years, and they come highly recommended.
At the time of writing, it’s currently out of stock at Amazon, but can be found on eBay.
Although there are cheaper alternatives out there, we don’t think it’s worth running the risk when the Eastwood is reasonably priced anyway.

If you don’t want to buy the tool, you may be able to rent locally, or a local friend or fellow enthusiast may have one lurking in their garage.
It may seem like something you’ll not use enough, but why not earn free beer and pizza from your buddies by doing theirs with it too? It’s the perfect business opportunity (assuming you accept beer and pizza as currency, that is.)
Heat gun – We think that this option offers exceptional value for money.
However, if you plan to use a heat gun frequently, then DeWalt's cordless alternative is far more convenient.
Car jack – We assume you already have one of these, but if not, we highly recommend going with a low profile option.
Jack stands – We know it’s easy not to bother, but it’s better to be safe than sorry. You can’t go wrong with these budget stands.
Additional tools:
- Torque wrench
- Lug socket
- Cloth/rag
- Brush/old toothbrush
- All-purpose cleaning product
- Infrared laser thermometer (Optional, but recommended)
- Extension cord (If required)
Getting Started
Now that we’ve got everything we need, it’s time to get those fenders rolled!
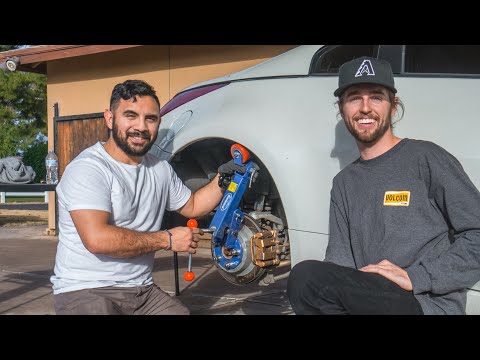
For those of you that prefer to have a video guide to check out before you carry out the process, we recommend checking this one:
We can’t stress enough how important patience is, at this point. Do not rush the job, take your time, and do things slowly – especially if it’s your first attempt at doing so.
Expect this to take several hours, but to ensure you don’t rush your way through it, make sure you schedule a day in your calendar to make sure you take your time.
Step 1 – Lift the car
The first thing we need to do is get the car in the air. Firstly, ensure that you’ve engaged your handbrake/e-brake/parking brake, use your car jack to lift the car to the required height, and then place the jack stand in a safe area.
With the car in the air, remove the wheels from the fenders you intend to roll. If you have any plastic trim in the fender, this will need removing for the time being.
Step 2- Prep the area
Although many overlook this step, it’s vitally important. The last thing we want is to have a stone/rock hiding in the fender when we begin rolling, as you can probably guess how that’ll go.
Using a stiff brush or an old toothbrush, stick your head in the fender and give the lip area that we’re planning to roll a thorough clean using the All-Purpose Cleaner to ensure no hidden dirt or debris.
Once you’re satisfied that the area is clean, have a final wipedown and wipe away any excess.
Step 3 – Attach the fender rolling tool
Fetch your fender rolling tool, and attach it to your wheel hub.
Then, align the swing arm of your rolling tool along the lip so that it will push the lip up and into the fender. We don’t need to go full-retard straight away. Aiming for a slight angle at this point will be fine.
When you’re satisfied with the position, lock in the length, and prepare to bust out the heat gun.
Step 4 – Bring the heat
As you’re (hopefully) aware, heat is essential for reshaping metal. It also helps to allow the paint to become more flexible, avoiding cracking.
Heat gun tips:
Don’t overheat the lip – Ideally, you want the metal to be hot to the touch, but not to the point where it burns your finger. If you invested in a thermometer, we’re aiming for around 120-130°F (around 50°C.)
Don’t put the gun too close to your paint – We want to get it warm, but not to bubble up the paint. A distance of around 7-10″ usually is ideal.
Keep the gun moving – If you keep it in one place, the heat will build up, again bubbling the paint.
With these pointers in mind, and with the fender rolling tool in position, we’ll be running the heat gun along the lip, ensuring that we’re covering where the metal/paint will be bending until it’s hot to the touch, or 120-130°F (around 50°C) if using in a thermometer.
Step 4 – Rolling the fender
Take a deep breath, and remember that patience is critical.
With the lip at the correct temperature and the fender rolling tool in the correct position, it’s time to begin turning the adjustment lever, using the fender tool’s nylon wheel to bend the lip backward and into the fender gradually.
Carry out the process on a small part of the fender at a time.
There’s no need to go the whole way across just yet. Heat and care in specific areas are more important than ensuring the entire arc is complete in one swoop.
Once you’ve completed the process on the whole area, you’ll have a slightly inwards-bent lip.
At this point, we adjust the angle of the roller to allow it to bend further inwards.
For the best possible results, do this as a gradual process in 3-4 stages, pushing the lip up further each time, adding more angle and pressure, and ensuring that the heat is maintained at the ideal temperatures to avoid damaging the paint.
It may not be necessary to go with an entirely flattened lip, depending on the fitment of your wheel/tire combo, so don’t feel the need to go any further than necessary.
Hopefully, at this point, you’ll be able to stand back and admire a job well done!
At this point, it’s a good idea to seal off your clean, neatly folded lip with some silicone.
If things haven’t gone quite as planned, and the paint has cracked or chipped, we’d recommend sanding and using rust prevention methods on the area to eliminate the risk of rust and corrosion further down the line.
DIY – Fender Rolling With a Baseball Bat/Metal Bar
As you may have guessed, we don’t recommend doing this. However, many missile owners out there want to get the job done right away with minimal fuss so that they can get out and shred some more tires. We get it.

It’s not a baseball bat, but we’re sure you can grasp the concept from this legendary JDM video.
Whether you plan to use an aluminium pole or a baseball bat, the concept is near-identical.
Firstly, check out how to do it with the fender rolling tool and heat gun outlined above to minimize the damage.
Again, the initial stages are identical:
Step 1 – Prep the area
Step 2 – Insert the bat/bar
It’s this step where the process changes a little.
Instead of removing the wheel and tire, keep them attached to the car.
Step 3 – Bring the heat
It’s still essential to heat the area as outlined above, and this is why so many bat/bar rolling jobs look so awful once completed.
Wrap the bat/bar in a cloth or tape to ensure there’s no direct contact.
Step 4 – Rolling the fender
Jack the car up enough to get the bat in between the fender and the tire, before lowering it.
With one person holding the bat/bar in place and twisting it in the same motion, drive the car slowly backward and forwards, allowing the bat/bar to spin around and force the metal upwards.
Remember to keep applying heat to achieve the optimal temperatures.
If you’re not achieving the correct angle, apply pressure, and angle it simultaneously, but be warned this is hard to get precise.
An alternative method is to move to a thicker part of the bat if shaped, but this is unlikely to be the case with a bar.
Although this is the “ghetto” method, some swear by it, where for others, it’s been a disaster and left them with a wavy fender, which has later rusted out.
Our general rule is to use the proper tool or have a pro job for a clean car, and for a missile, this method usually is satisfactory.
However, be prepared not to have the finished product look anywhere near as tidy, and apply rust prevention methods where necessary.
DIY – Fender Rolling With a Hammer
The hammer method is another ghetto alternative for a missile car without access to a rolling tool or a bar.
You can frequently see this done at grassroots drift events, and it still makes our eyes water to this day.
Here’s the method explained:

As you probably guessed, this is our least favorite method, and the chances of it looking perfect are painfully slim.
This process is simple; you will once again be heating the are to the optimal temperature, before hammering the lip back manually to flatten it into the fender.
Fender Rolling vs. Fender Pulling
There seems to be quite a bit of confusion online with the differences between rolling and pulling, but the concept is simple.
Rolling flattens the lip that’s scrubbing but still looks OEM from the outside, where pulling pulls the fender out to ensure additional clearance and visibly pulls the fender outwards.

Some drifters opt for rolling before realizing that they need even more clearance, and this is where pulling can be useful.
For others, they prefer the look of flared fenders, so they’ll go for the pulled look regardless, and perhaps purchase wider wheels or use spacers to fill out the gap.
On some cars, there may not be a lip to roll. In this case, pulling is often the only option to achieve perfect fitment.
Pulling is achieved with the fender rolling tool, except instead of using a subtle angle to push the lip upwards, you’ll want to use an aggressive angle and tension while forcing the lip away from the car.
Fender Rolling vs. Fender Cutting
Some owners go for the cutting method straight away if they know that rolling isn’t likely to achieve the perfect clearance, and this is sometimes the case with millimeter-perfect fitment.
It’s worth noting that once you’ve rolled the lip, it’s going to be more challenging to cut than working on a clean, fresh lip. So it may be worth doing it right away if you think it may be necessary.
Another time when enthusiasts opt for cutting is when fitting overfenders to their drift car.
Since the overfenders will likely go lower than the OEM fender, it’s not worth keeping the OEM metal in-place, as it’s likely to be both visible underneath and cause rubbing issues.
Therefore, cutting the OEM fender, sometimes going several inches into the bodywork, is the best solution for extremely wide bodykits.
However, if you do this, make sure you use the correct rust/corrosion prevention methods and ensure that you’re not leaving a rough edge that could potentially kill your tires.
Fender Rolling Cost
We get asked this a lot, but it depends on your area and how well you know the professional that’ll be doing the job.
We would expect to pay around $50-70 per fender for a simple roll, but if you’re opting for cutting or pulling, then that price could change drastically.
It can also be different on a car-to-car basis dependent on the fender design.
It may seem expensive, but if you’ve not got any of the required tools and don’t have any that you can hire or borrow, it may well be worth having a pro carry out the job to ensure a perfect result.
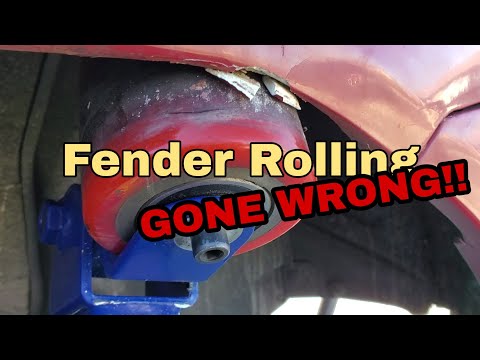
Fender Rolling Gone Wrong
We’ve certainly not created this section to cause concern. Instead, we want to point out how NOT to carry out the job.
Firstly, this painful Scion FR-S video features several face-palm moments. For the FR-S/BRZ/GT86 fans out there, you may not want to hit the play button!

We warned you about ensuring no filler/bondo is lurking in your fenders, and this video highlights why.
We’re sure you’ll agree, this isn’t the kind of job we’d like to be fixing!
We’ve seen dented, warped, and obliterated fenders by drifters doing things the wrong way, trying to show off to their buddies.
Don’t be that guy. Do things correctly, invest in the right equipment, and take your time.
Conclusion
Don’t let the above videos demotivate you from doing the job yourself, but use them as a useful guide for what not to do when you’re carrying out your fender rolling.
If you follow our step-by-step process, we’re sure that things will go smoothly – quite literally.
Remember that maintaining the fender at the optimal temperature combined with patience and care is vital.
We wish you the best of luck with your fender rolling efforts.
Feel free to reach out to us if you’d like your finished product to be featured here on Drifted.
So, there we have it! We hope that we’ve covered everything you could want to know about Fender Rolling in this guide.
Thank you for reading our Fender Rolling guide.
If you enjoyed this article, then please share it with the buttons at the side and bottom of your screen. If you’ve found this information useful, then please take a moment to share it with other drifting and automotive enthusiasts. We appreciate your support.
Photography credits
We thank the following entities for the use of their photography in this article:
- Kenny Alexander on Flickr
- Casey Goodman on Flickr
- J.YU. on Flickr
- Reg Aquino on Flickr
- George on Flickr
- itzjere on Flickr
Written by:
Published on:
Joe is an avid writer and car enthusiast. When he’s not cruising the streets alongside his friends in his Nissan Silvia S15, he’s drifting on his VR racing simulator.
Joe’s passion for cars is always on display. With a keen eye for detail and a deep understanding of the automotive industry, he hopes his writing conveys his excitement and knowledge of cars and games.
Joe’s work has been featured on many platforms including drivetribe.com, 180sx.club, carthrottle.com, smartdrivinggames.com, smartbikegames.com, databox.com and ceoblognation.com.
When he’s not behind the wheel or at his keyboard, he’s likely daydreaming of his ultimate ride – the legendary Lexus LFA.
Follow Joe on X.
 Cars Guide - Image")

