Ultimate Nascar Heat 4 Setups Guide
Are you struggling to keep up with the competition in NASCAR Heat 4? We’ve got the ultimate setups to help you capture pole position.
- Introduction
- NASCAR Heat 4 Wheel/Controller/AI Settings
- How to Adjust Your Car Setup
- NASCAR Heat 4 Setups
- Refining Your Setup
- Conclusion
Introduction
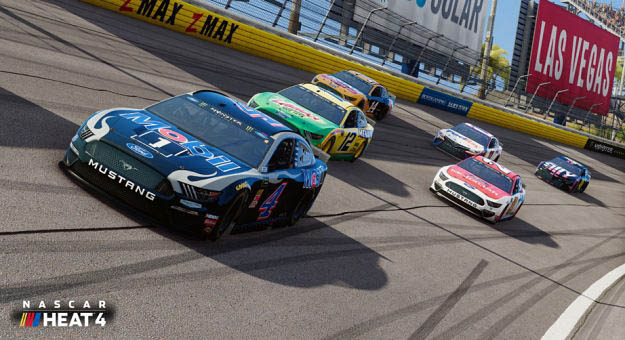
Launched in September 2019, NASCAR Heat 4 was an immediate success and remains a popular choice among NASCAR fans today.
Developed by Monster Games and published by 704Games, you can enjoy what Nascar HEAT 4 has to offer on the Microsoft Xbox One, Xbox One S, Xbox One X, Sony PlayStation 4, PlayStation 4 Pro, and PC platforms.
NASCAR Heat 4 introduced some significant changes from the third game in the series, with the most popular being improved handling and tire wear, day-to-night transitions, and superior AI to make things more challenging than ever.
With over half a million players still enjoying what the game has to offer, you’ll be able to get your hands on the game for a bargain price tag since NASCAR Heat 5 has now hit the shelves.
Given the minimal changes between the two versions, many have stuck with NASCAR Heat 4, opting to fine-tune their settings to stand the best chance at victory.
Recent announcements have hinted that there are no plans to release NASCAR Heat 6, with the development teams supposedly heading back to the drawing board with an entirely new game.
We’ve previously covered drift setups in Project CARS 2, GTA V, Forza Horizon 4, and Assetto Corsa.
This time around, we’ll be explaining how to refine a variety of NASCAR Heat 4 setups to perfection.
During our time playing NASCAR Heat 4, we’ve realized that a precise car setup is far more vital when it comes to oval racing than drifting. Even the most minor tweaks can be the deciding factor between a good or lousy tune.
Using the setups in this guide, we’ve achieved far quicker times than we could ever accomplish with the standard in-game configurations, and we do not doubt that they’ll also help you along the way.
If you’re looking to maximize your potential in the game, we always recommend taking time to understand what each adjustment does so that you can tweak our base setups to suit your needs perfectly.
NASCAR Heat 4 Wheel/Controller/AI Settings
Before you begin fine-tuning your setups in the game, it’s essential to ensure you’re using the optimal controller/wheel settings.
If you’re not running the ideal settings, then it can make even the best setups out there feel completely wrong in the game.
We do, of course, recommend enjoying NASCAR Heat 4 with a wheel/pedal setup for the ultimate experience, but we completely understand that this isn’t always an option.
NASCAR Heat 4 Wheel Settings
For those who are playing the game with the Logitech G920 (or similar) wheel, we recommend using the following wheel and force feedback (FFB) setup settings.
We’ve also found this to work great with various other wheels, so it’s worth trying to see how you get on.
If you’re still struggling with your wheel setup after watching the above guide, then we’d recommend searching for a custom setup for your specific wheel on YouTube or Reddit.
NASCAR Heat 4 Controller Settings
When it comes to making the most of the game with a controller, we’ve found the following video to provide the best setup. Controller-specific settings begin at 3:50.
Getting the controller settings perfected can sometimes be tricky.
We used this setup as a base, but increasing ‘Wedge’ (use 45-46 as a baseline) and adjusting the springs (to your personal preference) helped if things don’t feel quite right.
Alongside this, we also found that reducing camber on some of the wheel setups helped where the car perhaps feels a little loose or unpredictable.
If you’re finding the steering too sensitive, try changing the Wheel Lock setting to around 11-12, which will require more use of the analog stick on the controller to steer, allowing for more refinement.
NASCAR Heat 4 AI Settings
For a more realistic feel when playing the game, we’ve found these AI settings work the best:
How to Adjust Your Car Setup
We’re guessing you already know how to adjust your car setup, but if not, it’s pretty straightforward.
From NASCAR Heat 4’s main menu, head into ‘Game Options’ and ensure that the ‘Difficulty Preset’ within the ‘Gameplay’ tab is either ‘Expert’ or ‘Custom’.
After this, begin a race, and in the top right corner, you’ll find ‘Car Setup’. Press ‘CHANGE’, and you can now create your custom setup.
If you would prefer to test the basic presets before going with a custom setup, you can also choose between ‘Tight’ and ‘Loose’ to see if they work for you.
NASCAR Heat 4 Setups
Now that we’ve got our wheel/controller settings correct and know how to adjust the setup, it’s time to apply a setup to your vehicle to get it performing to the best of its abilities.
Since everyone’s driving style is unique, we feel that it’s essential to use this as a baseline tune before carrying out further tweaks designed for your personal preferences.
We’ll move on to ‘Refining Your Setup’ after this section to explain the in-depth adjustments and tweaks to consider.
For now, here are the basic setups for some of the most popular NASCAR Heat 4 circuits that have provided us with plenty of success in the game – and we hope they’ll do the same for you!
Atlanta Setup (Monster Energy Series/XFINITY)
Shocks Settings
FRONT
- Left Bump – 7 clicks
- Left Rebound – 9 clicks
- Right Bump – 7 clicks
- Right Rebound – 8 clicks
REAR
- Left Bump – 6 clicks
- Left Rebound – 8 clicks
- Right Bump – 9 clicks
- Right Rebound – 9 clicks
Weight Settings
- Left Weight – 54.2%
- Front Weight – 52.0%
- Wedge – 53.5%
- Front Ride Height – 4.000″
- Rear Ride Height – 4.000″
Springs Settings
FRONT
- Left Spring – 1,200 lbs/in
- Right Spring – 1,160 lbs/in
REAR
- Left Spring – 550lbs/in
- Right Spring – 590 lbs/in
Tire Settings
FRONT
- LF Pressure – 21.00 psi
- RF Pressure – 49.00 psi
REAR
- LR Pressure – 21.00 psi
- RR Pressure – 48.00 psi
Misc. Settings
- LF Camber – 2.5 deg
- RF Camber – -1.4 deg
- Front Swaybar – 1.435″
- Rear Swaybar – None
- Left Track Bar – 11.13″
- Right Track Bar – 11.13″
- Brake Bias – 70%
- Grille Tape – 45%
- Wheel Lock – 8 deg
- Steering Offset – 0.150
Gear Settings
- 1st Gear – 2.70
- 2nd Gear – 1.90
- 3rd Gear – 1.35
- 4th Gear – 1.05
- Rear End Ratio – 3.07
Atlanta Setup (Trucks)
Shocks Settings
FRONT
- Left Bump – 4 clicks
- Left Rebound – 6 clicks
- Right Bump – 4 clicks
- Right Rebound – 6 clicks
REAR
- Left Bump – 4 clicks
- Left Rebound – 6 clicks
- Right Bump – 4 clicks
- Right Rebound – 6 clicks
Weight Settings
- Left Weight – 54.2%
- Front Weight – 52.0%
- Wedge – 53.5%
- Front Ride Height – 4.000″
- Rear Ride Height – 4.000″
Springs Settings
FRONT
- Left Spring – 1,000 lbs/in
- Right Spring – 950 lbs/in
REAR
- Left Spring – 350 lbs/in
- Right Spring – 370 lbs/in
Tire Settings
FRONT
- LF Pressure – 21.00 psi
- RF Pressure – 46.00 psi
REAR
- LR Pressure – 21.00 psi
- RR Pressure – 45.00 psi
Misc. Settings
- LF Camber – 5.0 deg
- RF Camber – -2.0 deg
- Front Swaybar – 1.150″
- Rear Swaybar – None
- Left Track Bar – 10.00″
- Right Track Bar – 10.11″
- Brake Bias – 70%
- Grille Tape – 50%
- Wheel Lock – 9 deg
- Steering Offset – 0.050
Gear Settings
- 1st Gear – 3.00
- 2nd Gear – 2.10
- 3rd Gear – 1.45
- 4th Gear – 1.00
- Rear End Ratio – 3.25
Auto Club Speedway Setup
Shocks Settings
FRONT
- Left Bump – 5 clicks
- Left Rebound – 7 clicks
- Right Bump – 5 clicks
- Right Rebound – 7 clicks
REAR
- Left Bump – 5 clicks
- Left Rebound – 7 clicks
- Right Bump – 5 clicks
- Right Rebound – 7 clicks
Weight Settings
- Left Weight – 54.2%
- Front Weight – 52%
- Wedge – 53.0%
- Front Ride Height – 4.000″
- Rear Ride Height – 4.000″
Springs Settings
FRONT
- Left Spring – 700 lbs/in
- Right Spring – 700 lbs/in
REAR
- Left Spring – 500 lbs/in
- Right Spring – 550 lbs/in
Tire Settings
FRONT
- LF Pressure – 20.00 psi
- RF Pressure – 45.00 psi
REAR
- LR Pressure – 20.00 psi
- RR Pressure – 44.00 psi
Misc. Settings
- LF Camber – 2.0 deg
- RF Camber – -3.0 deg
- Front Swaybar – 1.150″
- Rear Swaybar – None
- Left Track Bar – 10.50″
- Right Track Bar – 10.00″
- Brake Bias – 81%
- Grille Tape – 50%
- Wheel Lock – 9 deg
- Steering Offset – 0.050
Gear Settings
- 1st Gear – 3.00
- 2nd Gear – 1.95
- 3rd Gear – 1.40
- 4th Gear – 1.05
- Rear End Ratio – 3.15
Daytona Setup
Shocks Settings
FRONT
- Left Bump – 5 clicks
- Left Rebound – 7 clicks
- Right Bump – 5 clicks
- Right Rebound – 7 clicks
REAR
- Left Bump – 4 clicks
- Left Rebound – 6 clicks
- Right Bump – 4 clicks
- Right Rebound – 6 clicks
Weight Settings
- Left Weight – 54.2%
- Front Weight – 52.0%
- Wedge – 53.0%
- Front Ride Height – 4.000″
- Rear Ride Height – 4.000″
Springs Settings
FRONT
- Left Spring – 1,200 lbs/in
- Right Spring – 1,000 lbs/in
REAR
- Left Spring – 500 lbs/in
- Right Spring – 550 lbs/in
Tire Settings
FRONT
- LF Pressure – 55.00 psi
- RF Pressure – 55.00 psi
REAR
- LR Pressure – 55.00 psi
- RR Pressure – 55.00 psi
Misc. Settings
- LF Camber – 7 deg
- RF Camber – -7.0 deg
- Front Swaybar – 1.315″
- Rear Swaybar – None
- Left Track Bar – 12.00″
- Right Track Bar – 13.00″
- Brake Bias – 80%
- Grille Tape – 60%
- Wheel Lock – 9 deg
- Steering Offset – 0.150
Gear Settings
- 1st Gear – 3.50
- 2nd Gear – 2.00
- 3rd Gear – 1.30
- 4th Gear – 1.00
- Rear End Ratio – 2.80
Bristol Setup
Shocks Settings
FRONT
- Left Bump – 4 clicks
- Left Rebound – 4 clicks
- Right Bump – 5 clicks
- Right Rebound – 4 clicks
REAR
- Left Bump – 4 clicks
- Left Rebound – 5 clicks
- Right Bump – 4 clicks
- Right Rebound – 4 clicks
Weight Settings
- Left Weight – 54.2%
- Front Weight – 51.5%
- Wedge – 50.00%
- Front Ride Height – 4.000″
- Rear Ride Height – 4.000″
Springs Settings
FRONT
- Left Spring – 1,160 lbs/in
- Right Spring – 1,140 lbs/in
REAR
- Left Spring – 520 lbs/in
- Right Spring – 530 lbs/in
Tire Settings
FRONT
- LF Pressure – 16.00 psi
- RF Pressure – 38.00 psi
REAR
- LR Pressure – 18.00 psi
- RR Pressure – 35.00 psi
Misc. Settings
- LF Camber – 3.0 deg
- RF Camber – -3.0 deg
- Front Swaybar – 1.435″
- Rear Swaybar – None
- Left Track Bar – 8.75″
- Right Track Bar – 8.75″
- Brake Bias – 60%
- Grille Tape – 40%
- Wheel Lock – 8 deg
- Steering Offset – 0.150
Gear Settings
- 1st Gear – 3.00
- 2nd Gear – 2.20
- 3rd Gear – 1.40
- 4th Gear – 0.95
- Rear End Ratio – 4.63
Charlotte Setup
Shocks Settings
FRONT
- Left Bump – 4 clicks
- Left Rebound – 4 clicks
- Right Bump – 4 clicks
- Right Rebound – 4 clicks
REAR
- Left Bump – 4 clicks
- Left Rebound – 4 clicks
- Right Bump – 4 clicks
- Right Rebound – 4 clicks
Weight Settings
- Left Weight – 54.2%
- Front Weight – 51.4%
- Wedge – 52.0%
- Front Ride Height – 4.000″
- Rear Ride Height – 4.000″
Springs Settings
FRONT
- Left Spring – 1,100 lbs/in
- Right Spring – 1,100 lbs/in
REAR
- Left Spring – 500 lbs/in
- Right Spring – 550 lbs/in
Tire Settings
FRONT
- LF Pressure – 21.00 psi
- RF Pressure – 57.00 psi
REAR
- LR Pressure – 22.00 psi
- RR Pressure – 56.00 psi
Misc. Settings
- LF Camber – 3.2 deg
- RF Camber – -2.0 deg
- Front Swaybar – 1.435″
- Rear Swaybar – None
- Left Track Bar – 11.25″
- Right Track Bar – 11.88″
- Brake Bias – 75%
- Grille Tape – 40%
- Wheel Lock – 8 deg
- Steering Offset – 0.050
Gear Settings
- 1st Gear – 2.15
- 2nd Gear – 1.45
- 3rd Gear – 1.15
- 4th Gear – 0.90
- Rear End Ratio – 3.75
Dover Setup
Shocks Settings
FRONT
- Left Bump – 4 clicks
- Left Rebound – 4 clicks
- Right Bump – 4 clicks
- Right Rebound – 4 clicks
REAR
- Left Bump – 4 clicks
- Left Rebound – 4 clicks
- Right Bump – 4 clicks
- Right Rebound – 4 clicks
Weight Settings
- Left Weight – 54.2%
- Front Weight – 51.5%
- Wedge – 51.0%
- Front Ride Height – 4.000″
- Rear Ride Height – 4.000″
Springs Settings
FRONT
- Left Spring – 1,100 lbs/in
- Right Spring – 1,100 lbs/in
REAR
- Left Spring – 550 lbs/in
- Right Spring – 600 lbs/in
Tire Settings
FRONT
- LF Pressure – 19.00 psi
- RF Pressure – 47.00 psi
REAR
- LR Pressure – 20.00 psi
- RR Pressure – 47.00 psi
Misc. Settings
- LF Camber – 2.5 deg
- RF Camber – -3.0 deg
- Front Swaybar – 1.315″
- Rear Swaybar – None
- Left Track Bar – 10.50″
- Right Track Bar – 10.00″
- Brake Bias – 70%
- Grille Tape – 40%
- Wheel Lock – 8 deg
- Steering Offset – 0.125
Gear Settings
- 1st Gear – 2.80
- 2nd Gear – 2.20
- 3rd Gear – 1.40
- 4th Gear – 1.00
- Rear End Ratio – 3.80
Eldora (Dirt) Setup – Trucks
Shocks Settings
FRONT
- Left Bump – 4 clicks
- Left Rebound – 4 clicks
- Right Bump – 7 clicks
- Right Rebound – 6 clicks
REAR
- Left Bump – 5 clicks
- Left Rebound – 5 clicks
- Right Bump – 8 clicks
- Right Rebound – 7 clicks
Weight Settings
- Left Weight – 54.2%
- Front Weight – 49.5%
- Wedge – 48.0%
- Front Ride Height – 5.000″
- Rear Ride Height – 5.000″
Springs Settings
FRONT
- Left Spring – 410 lbs/in
- Right Spring – 390 lbs/in
REAR
- Left Spring – 200 lbs/in
- Right Spring – 210 lbs/in
Tire Settings
FRONT
- LF Pressure – 11.00 psi
- RF Pressure – 18.00 psi
REAR
- LR Pressure – 12.00 psi
- RR Pressure – 22.00 psi
Misc. Settings
- LF Camber – 7.0 deg
- RF Camber – -7.0 deg
- Front Swaybar – 2.000″
- Rear Swaybar – None
- Left Track Bar – 14.00″
- Right Track Bar – 14.00″
- Brake Bias – 55%
- Grille Tape – 20%
- Wheel Lock – 17 deg
- Steering Offset – 0.100
Gear Settings (Only uses 1st and 2nd gears)
- 1st Gear – 2.50
- 2nd Gear – 1.55
- 3rd Gear – 1.10
- 4th Gear – 1.10
- Rear End Ratio – 5.60
With a total of 38 tracks in the game, we understand that we’ve missed some off, but we feel that these setups provide an excellent base for the most popular choices.
If you’re looking for alternative setups and tuning information, then Reddit user u/Nuts1979 has created this incredible spreadsheet of base tunes for every track in the game.
Refining Your Setup
Since everyone drives differently, it’s unlikely that a tuning setup will suit your personal preferences right away, which is why it’s always beneficial to have a basic understanding when it comes to fine-tweaking your tune.
We’ve found this guide to be fantastic when it comes to offering an in-depth yet simple to understand guide to refining each aspect of your setup.
If you wish to gain an advanced understanding of everything there is to know when it comes down to creating the ultimate NASCAR setup – we recommend heading over to this guide.
For those who prefer watching rather than reading, YouTuber RED4424 also provides this excellent video.
Conclusion
We feel that these base tunes will provide an excellent platform to get you started with NASCAR Heat 4 setups, but we do highly recommend taking the time to learn how to fine-tweak them for your needs.
Not only will this help improve your skill within the game, but you’ll also gain a far better understanding when it comes to racing and tuning knowledge.
We would expect to spend several hours creating a setup specifically tuned to fit your driving style, with plenty of trial and error along the way, but once you find that perfect setup, you’ll wish you had done it earlier.
Consistent laps are what will earn you the win in NASCAR races, so putting time into refining your skills will certainly be worthwhile.
As you improve your skills, you’ll learn that you don’t always need to stick with the racing line or brake exactly when the game tells you, as you’ll eventually learn to push beyond these limiting boundaries.
There are some fantastic YouTubers out there, with plenty of content and tunes to help you refine your skills and knowledge. We would highly recommend looking at Knee Pit Gaming, RED4424’s channels.
If you’re not able to play NASCAR Heat 4 right now, then make sure you head over to the Drifted Arcade, where we have the fantastic and completely free NASCAR Racing for you to enjoy.
For those that feel like this guide has helped take them to NASCAR mastery, why not consider the next step by becoming a real-life NASCAR driver? After all, You have to dream before your dreams can come true!
So, there we have it! We hope that we’ve covered everything you could want to know about NASCAR Heat 4 Setups in this guide.
Thank you for reading our NASCAR Heat 4 Setups guide.
If you enjoyed this article, please share it with the buttons at the bottom of your screen. If you’ve found this information helpful, then please take a moment to share it with other NASCAR Heat 4 and racing game enthusiasts. We appreciate your support.
Photography credits
We thank the following entities for the use of their photography in this article:


